Creating an owner’s manual is often underestimated. It sits at the intersection of engineering, product, and user experience, and when done right, it becomes a key part of how riders understand and trust a product.
For the BMC Kaius Generation 2, the objective was clear: deliver a manual that is technically accurate, visually intuitive, and aligned with the premium positioning of the bike.
Defining the Structure from a Product Perspective
The foundation of the manual started with structure.
Rather than relying on legacy formats, I built the framework from scratch based on my technical background and experience in product management. The goal was to mirror how a rider actually interacts with the bike, from first setup to advanced adjustments and maintenance.
This led to a clear, logical flow:
- Introduction
- Safety guidelines
- Product overview
- Adjustments and torque specs
- Assembly steps including key systems (cockpit, drivetrain, braking, integration)
- Maintenance guidelines
Each section was designed to reduce friction: short, focused, and action-oriented.
Writing the Copy: Precision Over Volume
The copy was developed with a simple principle: clarity beats completeness.
Instead of overloading the manual with information, the focus was on delivering the right information at the right moment. This meant:
- Creating clear illustrations
- Using concise, directive language
- Avoiding unnecessary technical jargon where possible
- Highlighting critical actions (torque, safety points, tips)
- Ensuring consistency across all sections
At the same time, the technical depth remained intact—especially for key components and adjustments where precision matters.
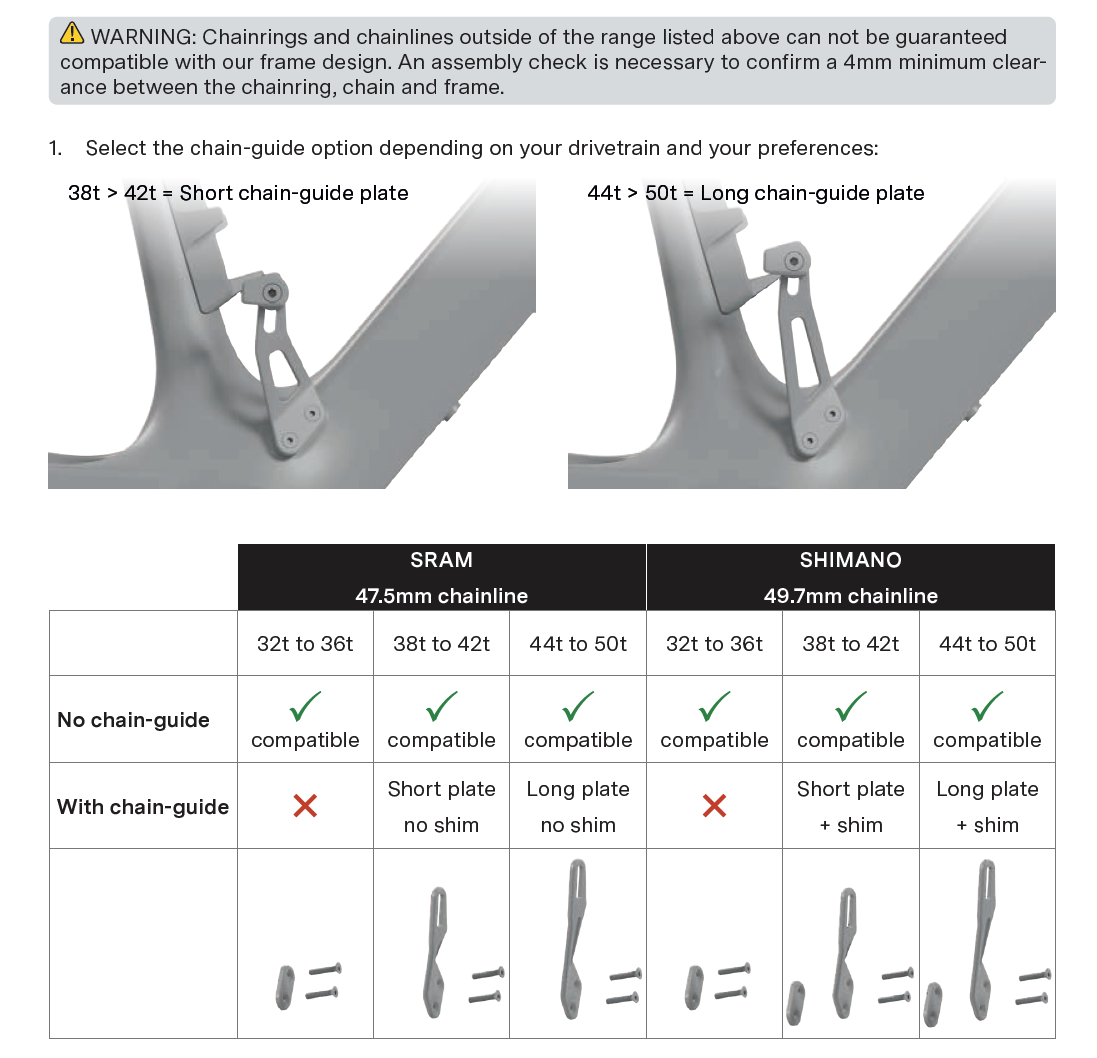
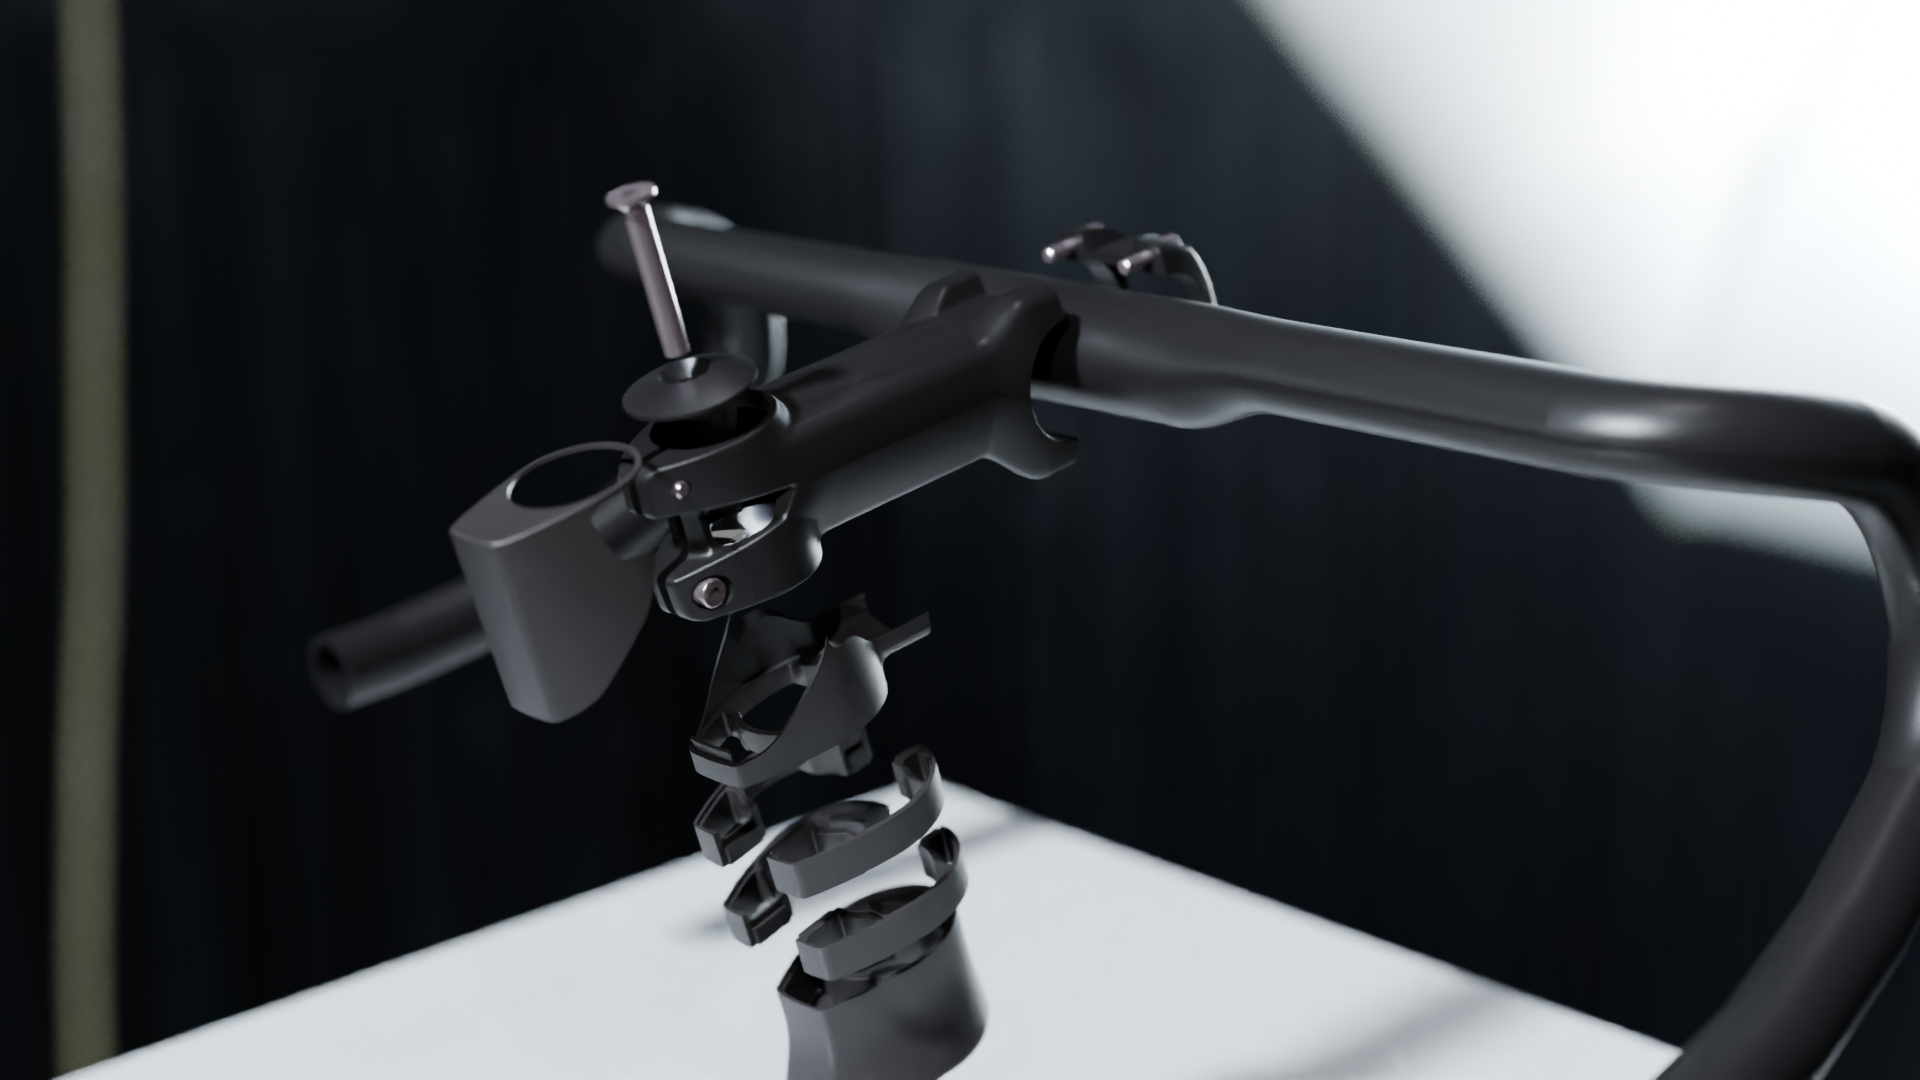
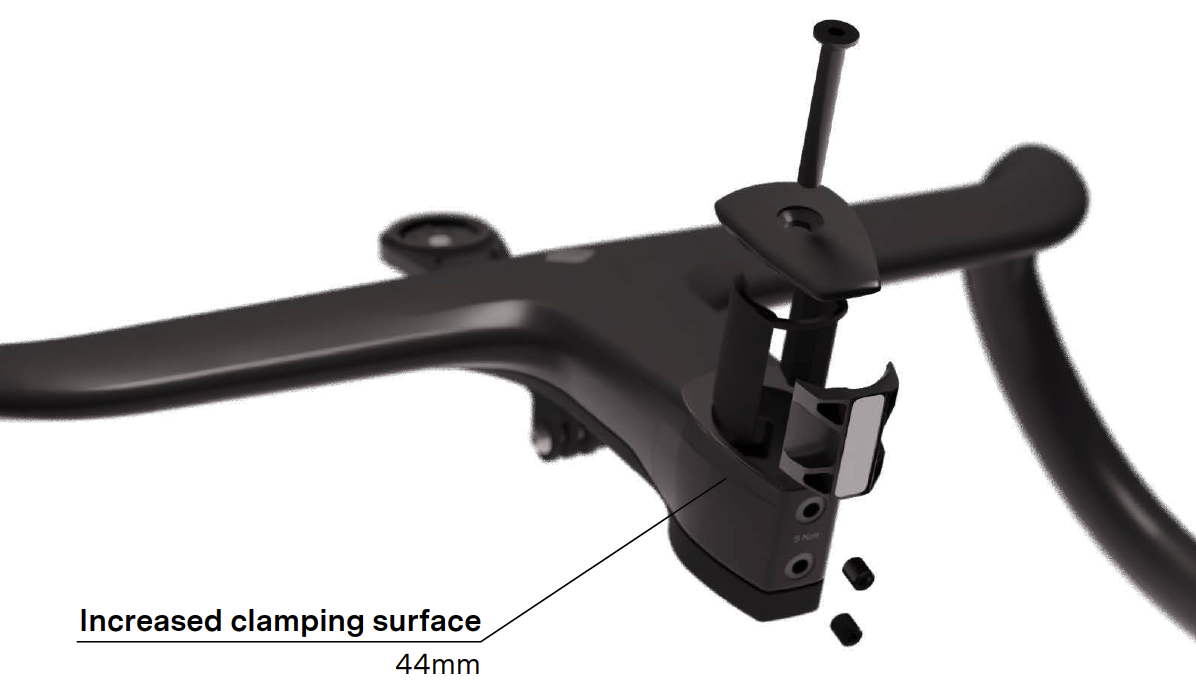
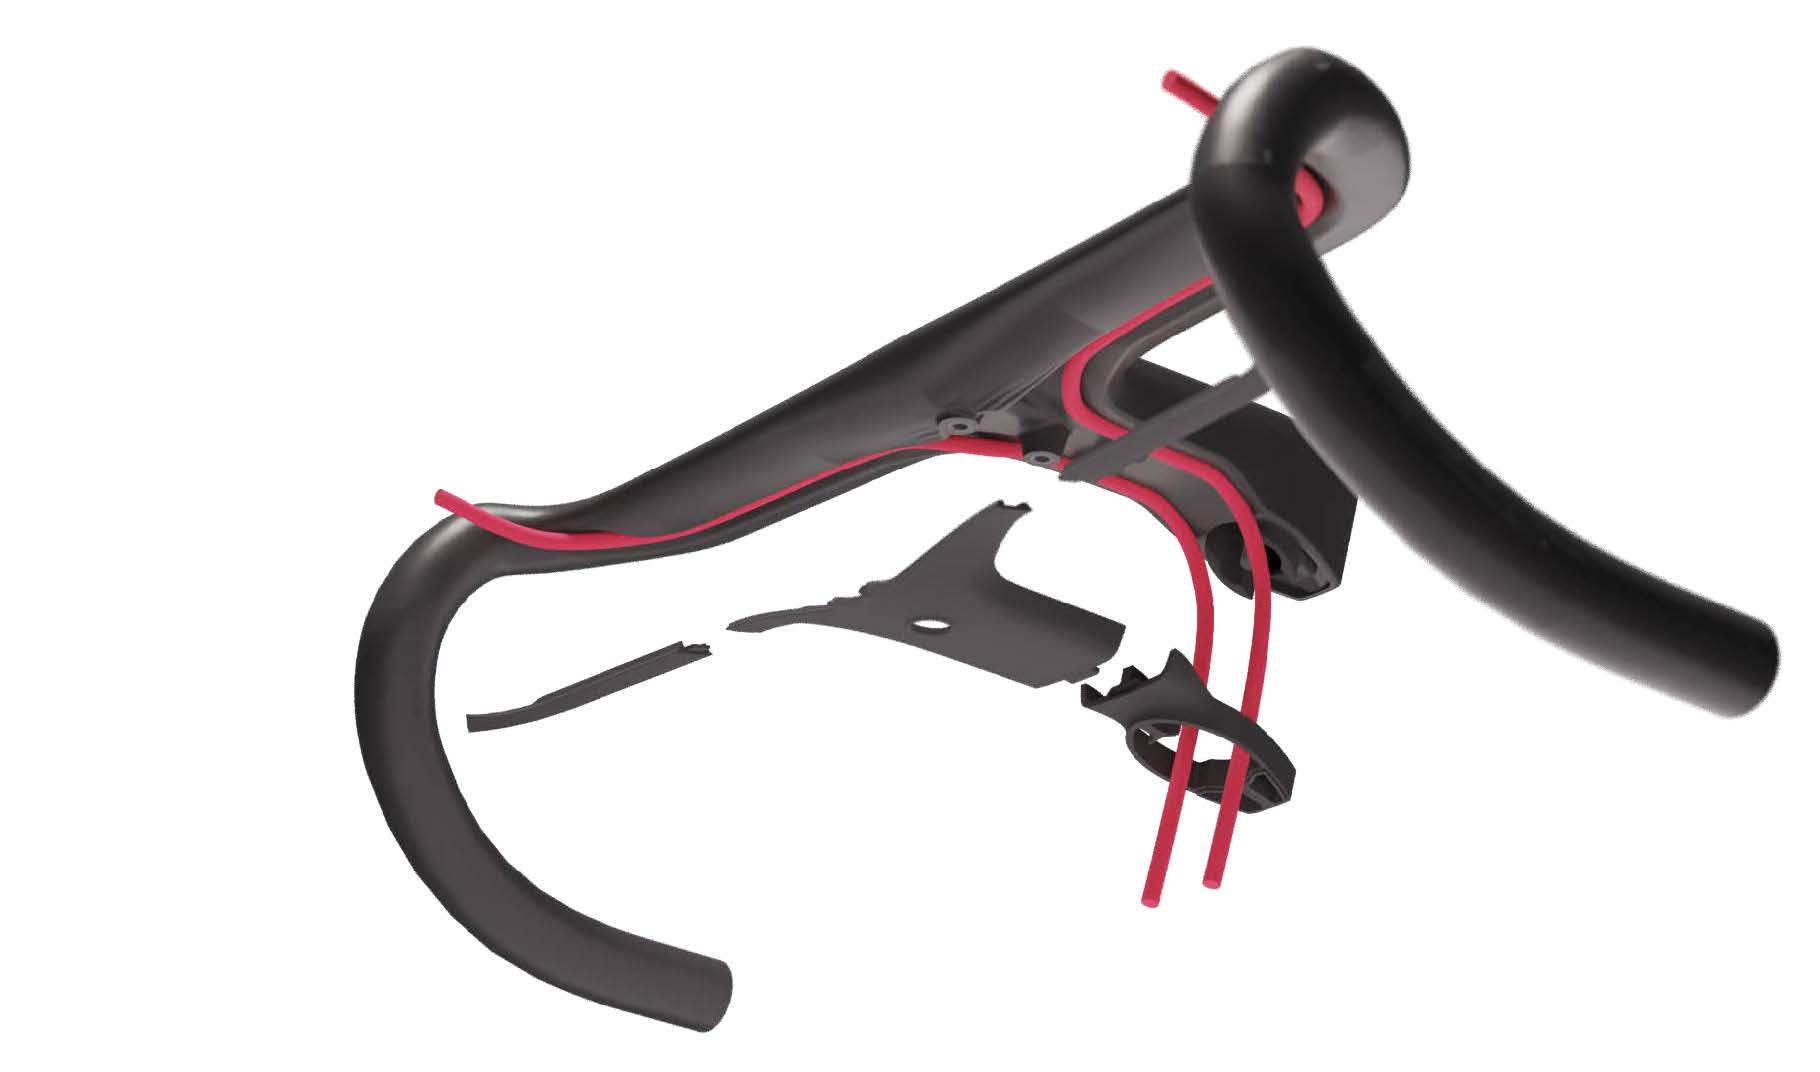
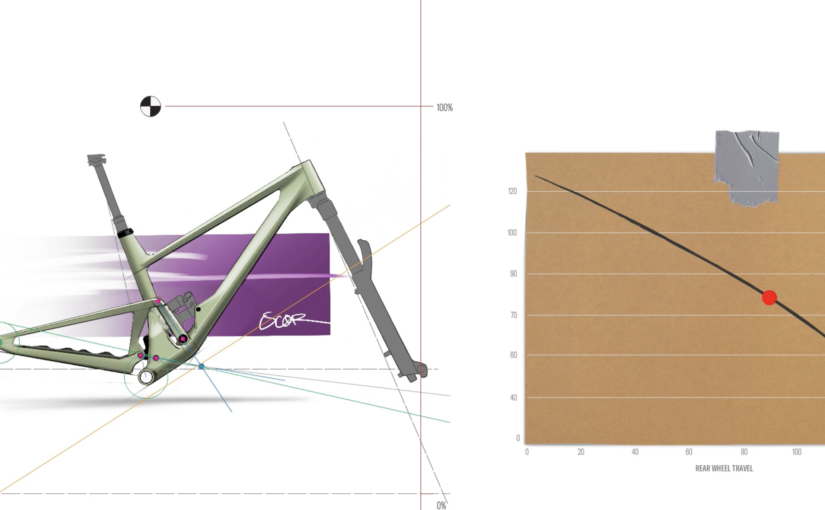
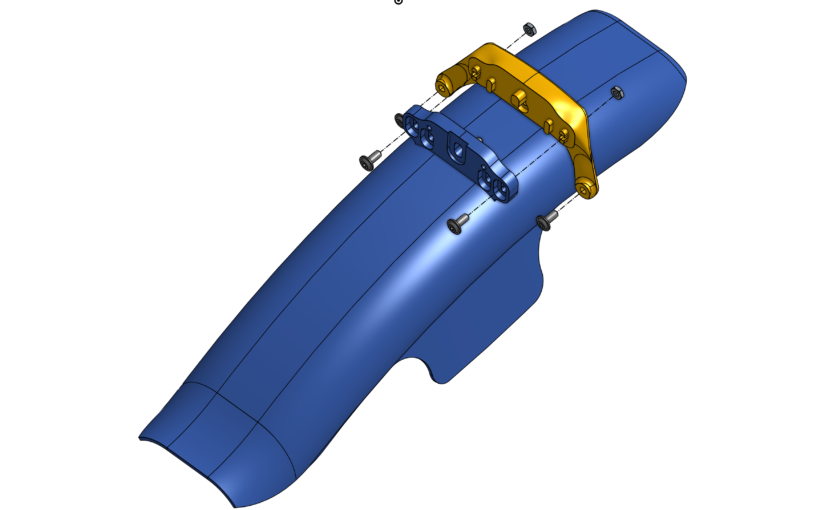
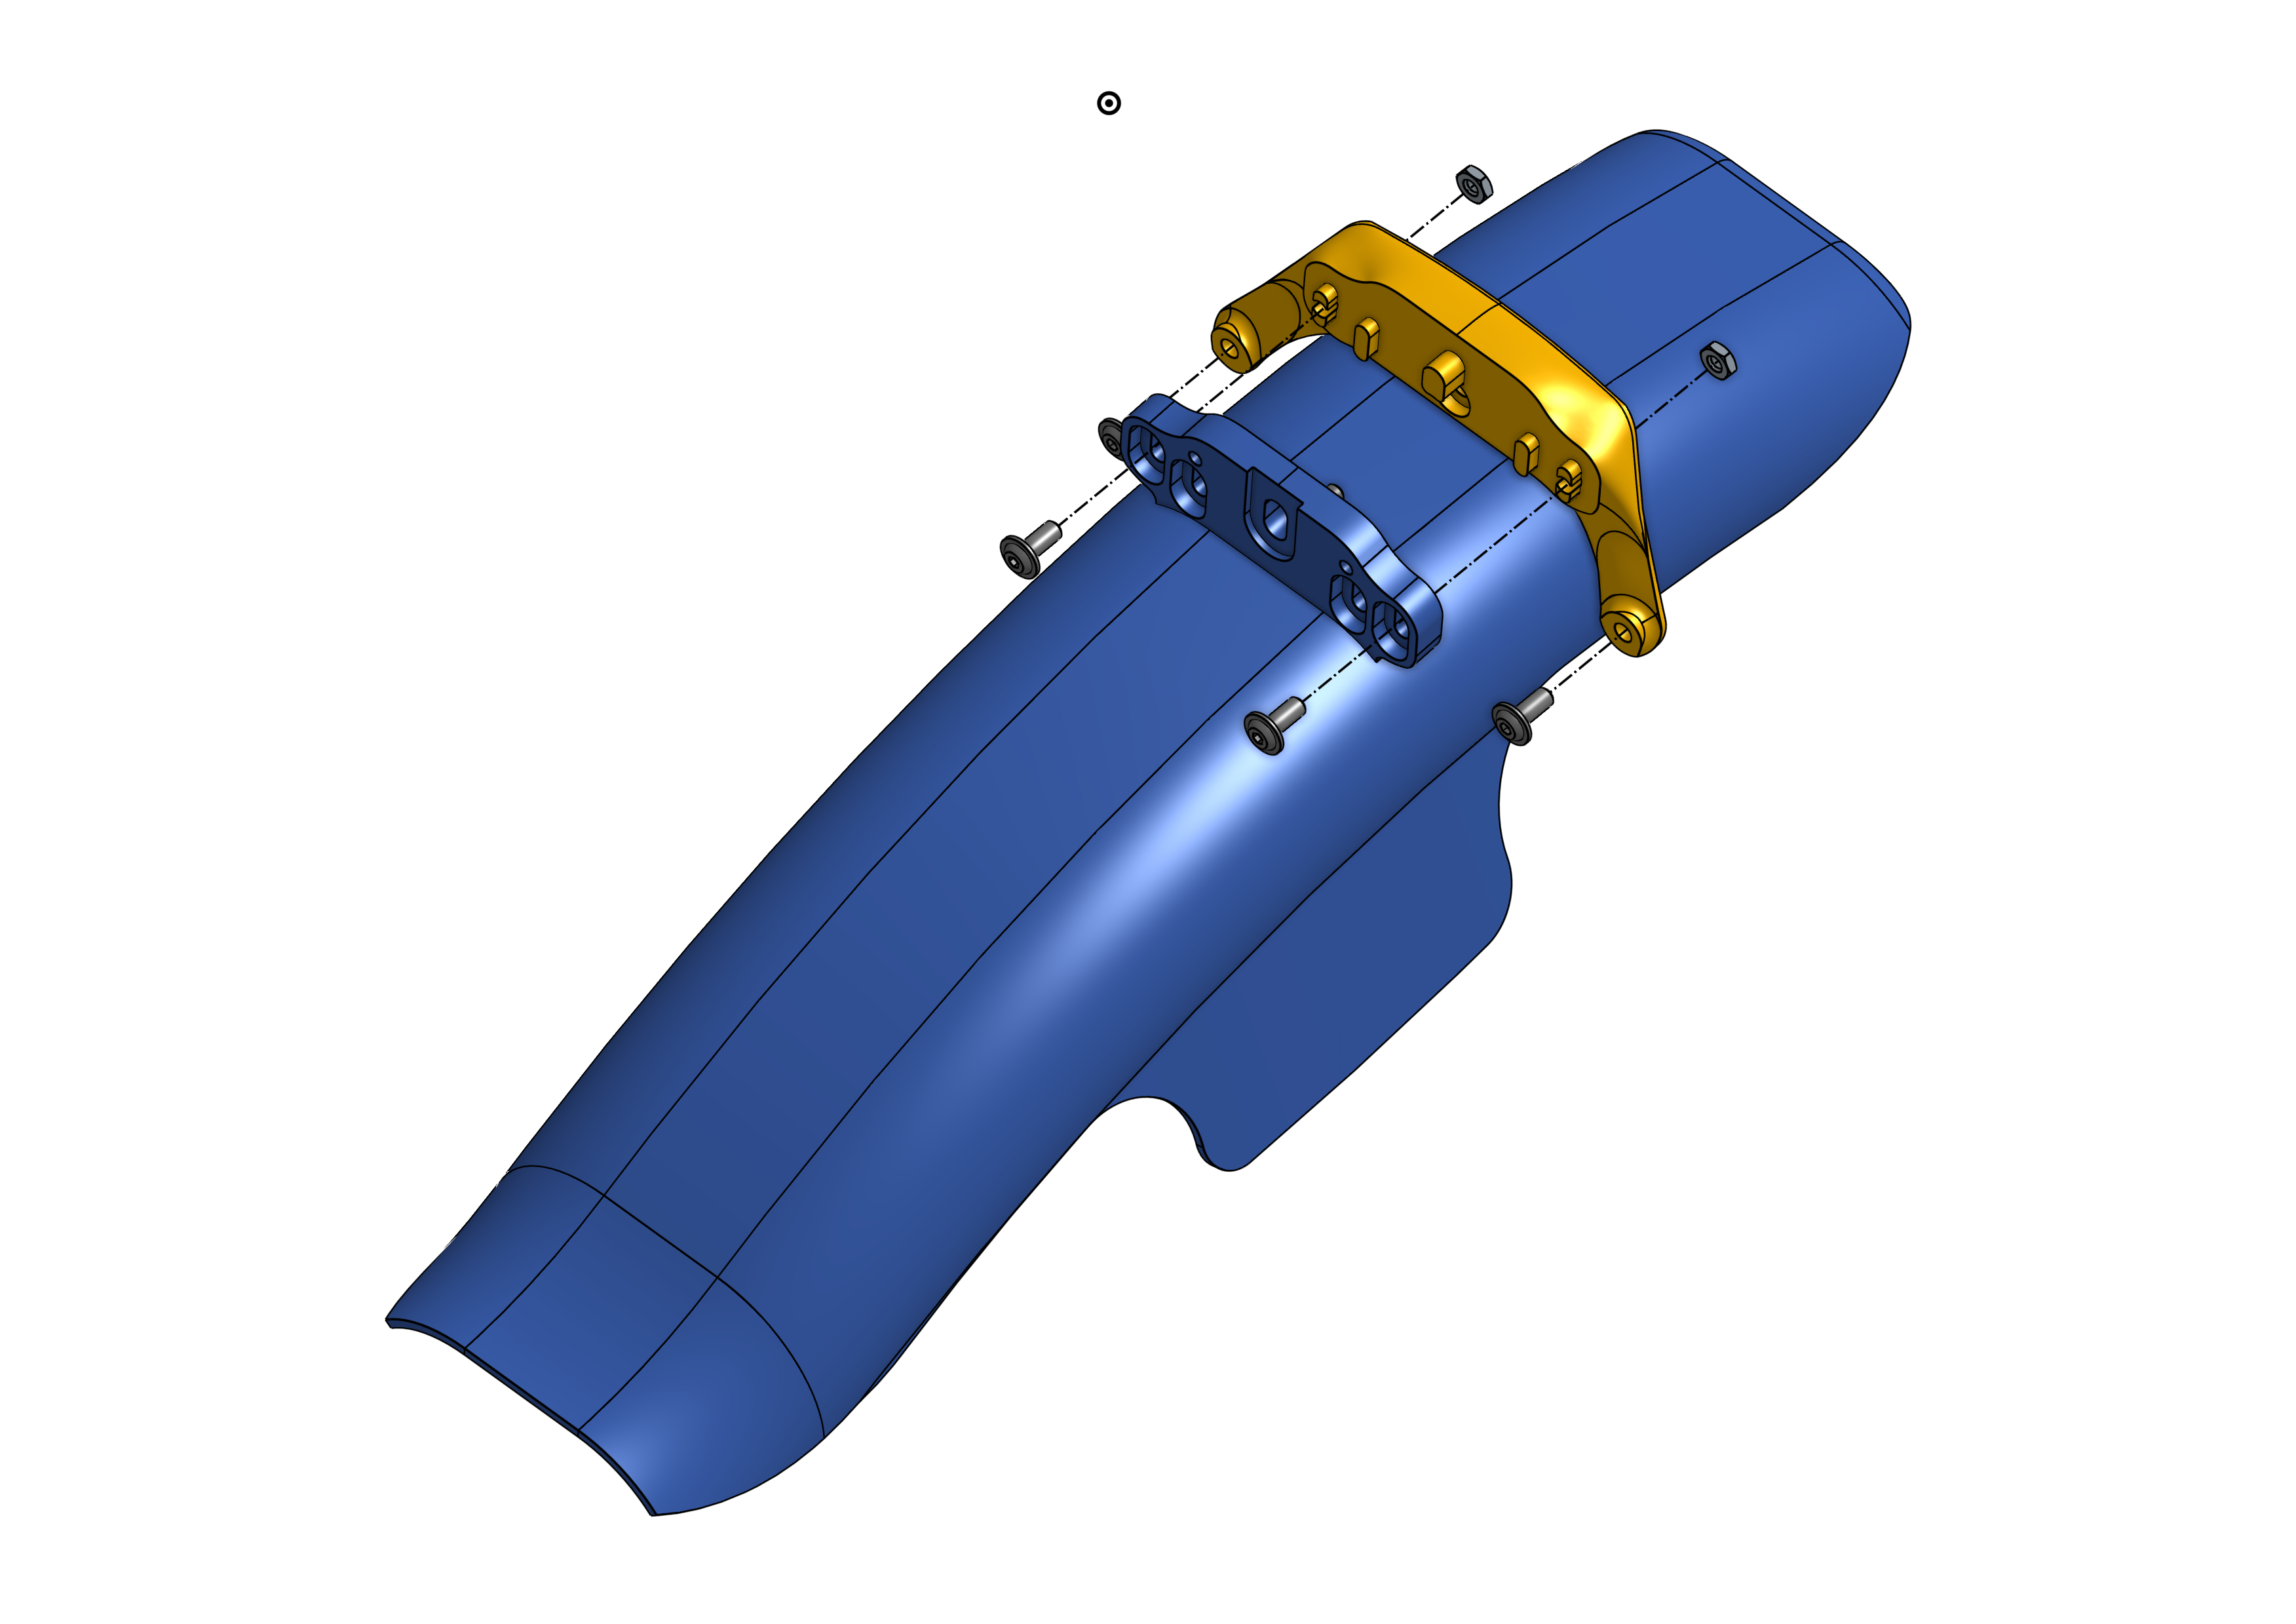
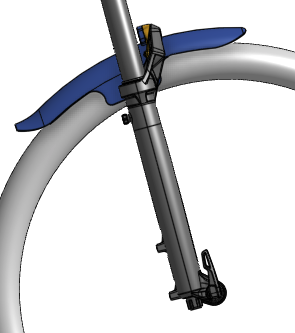
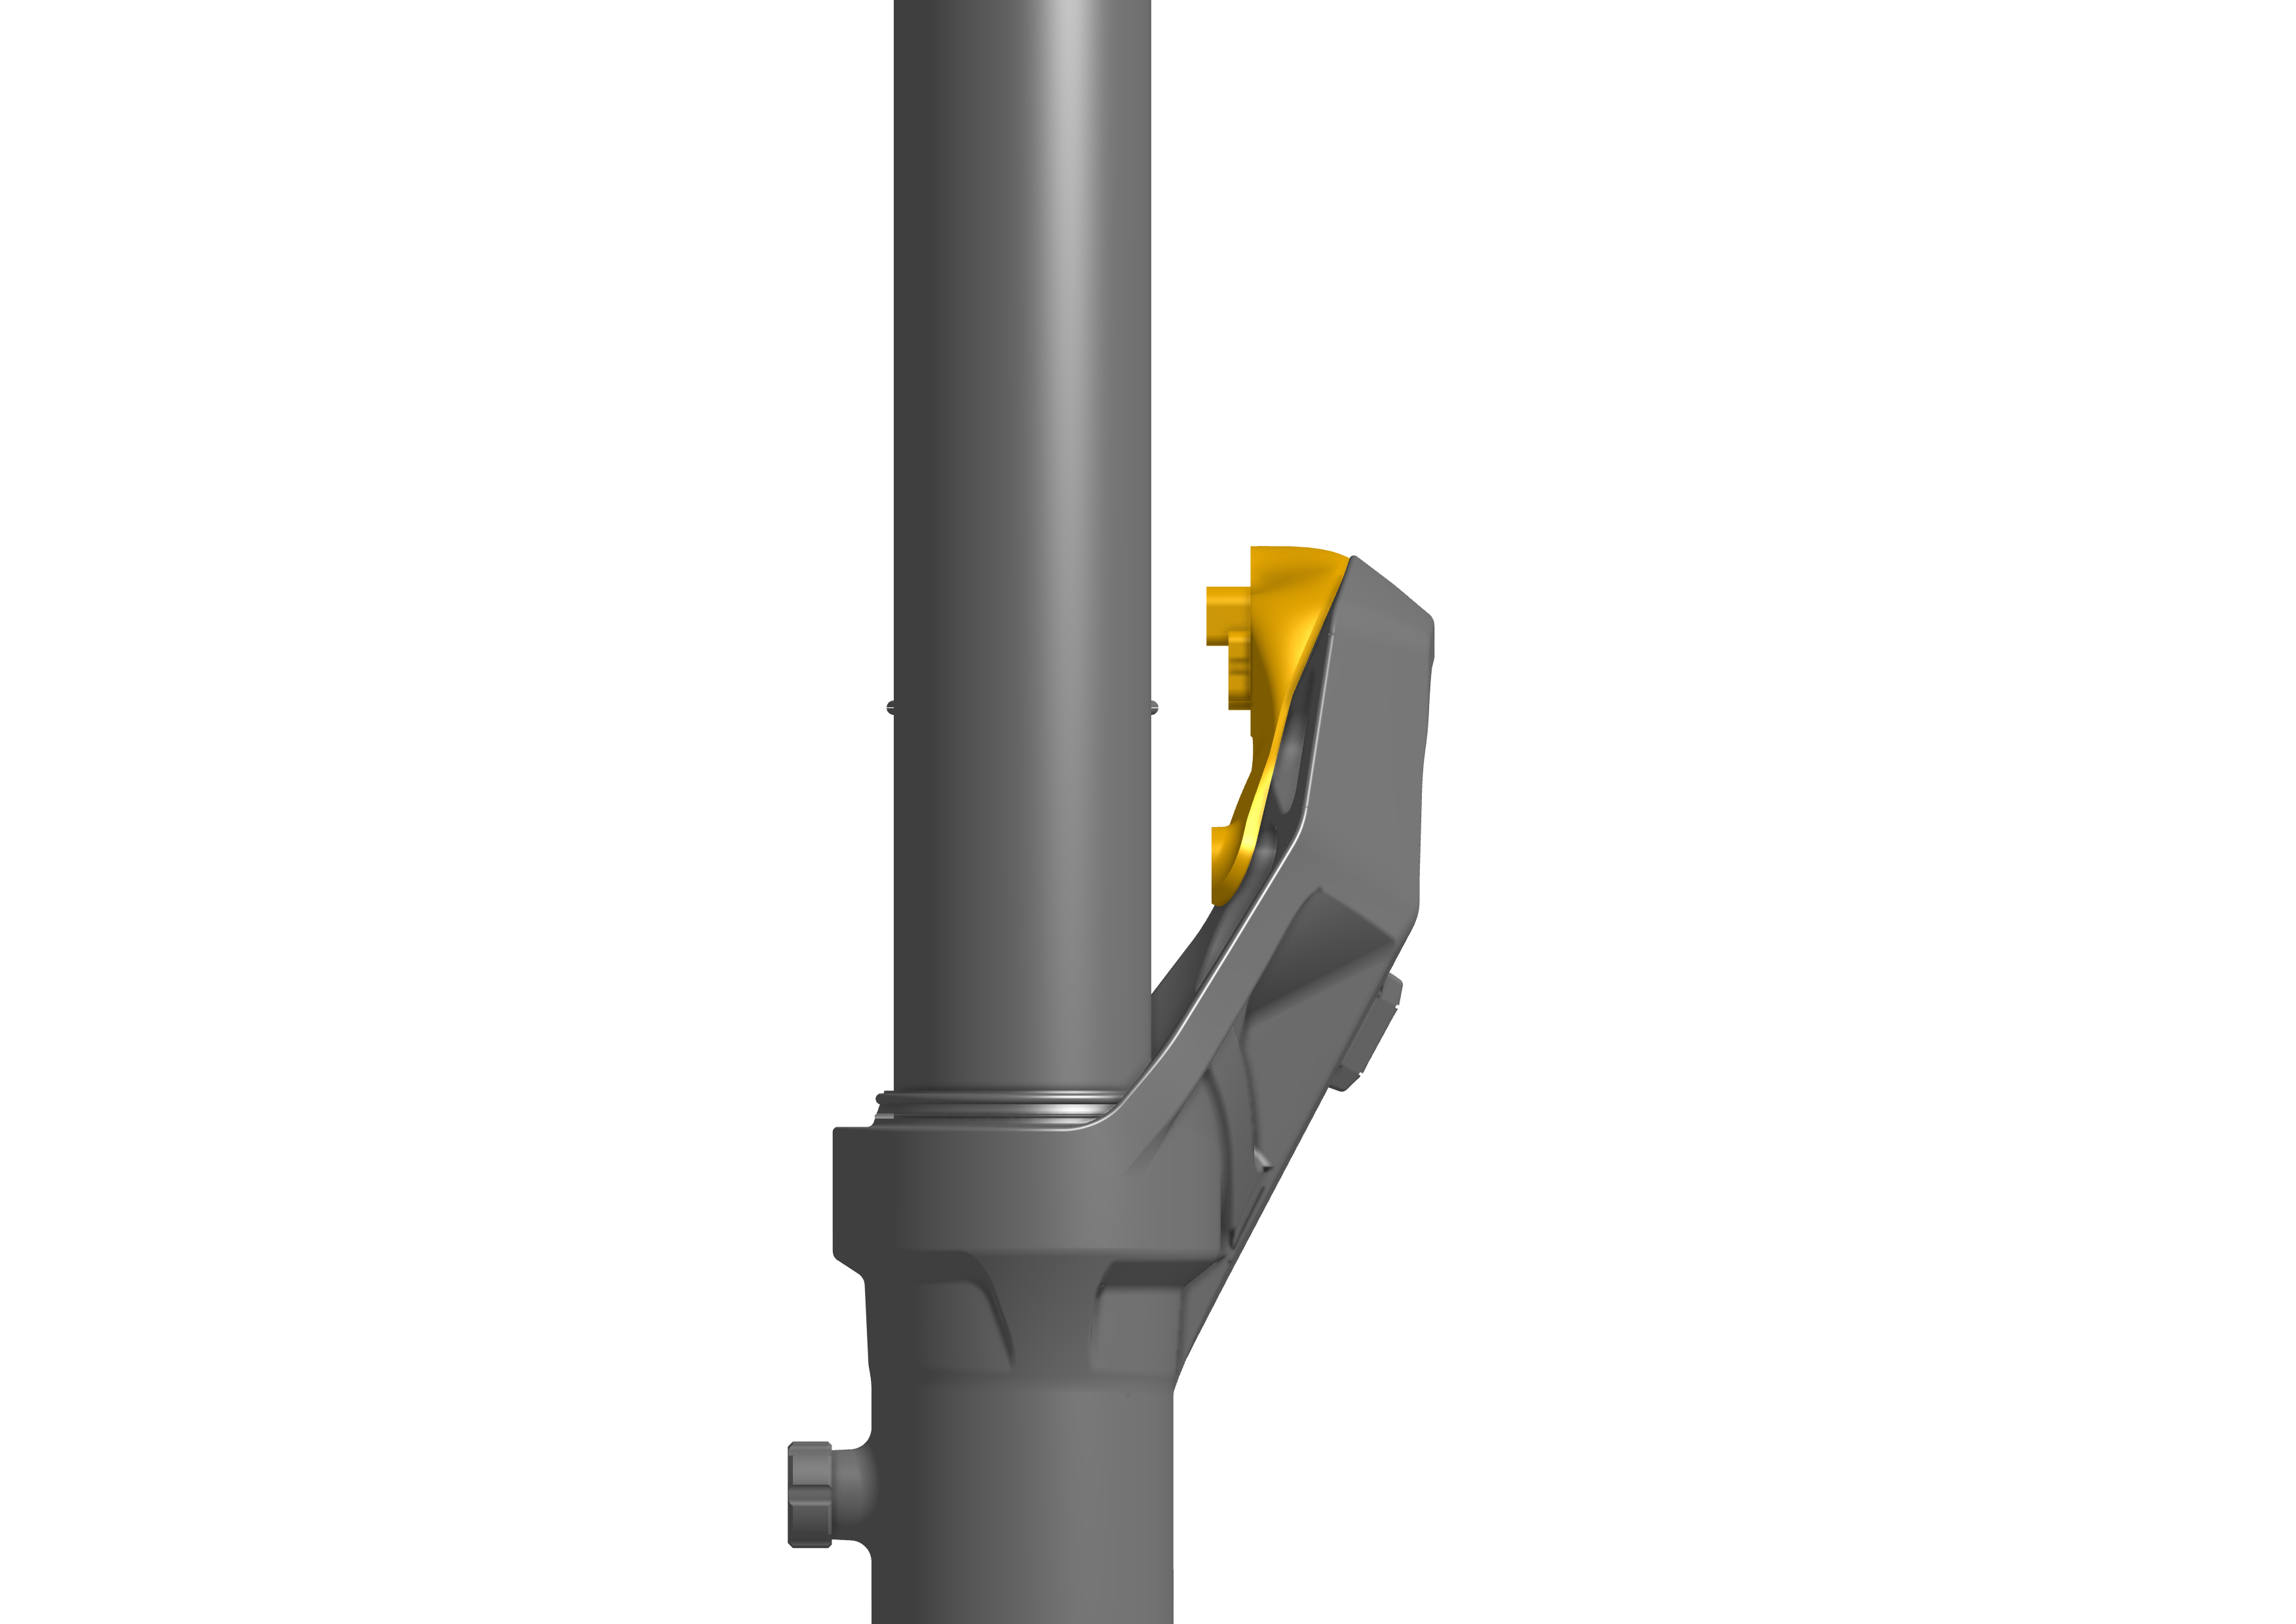
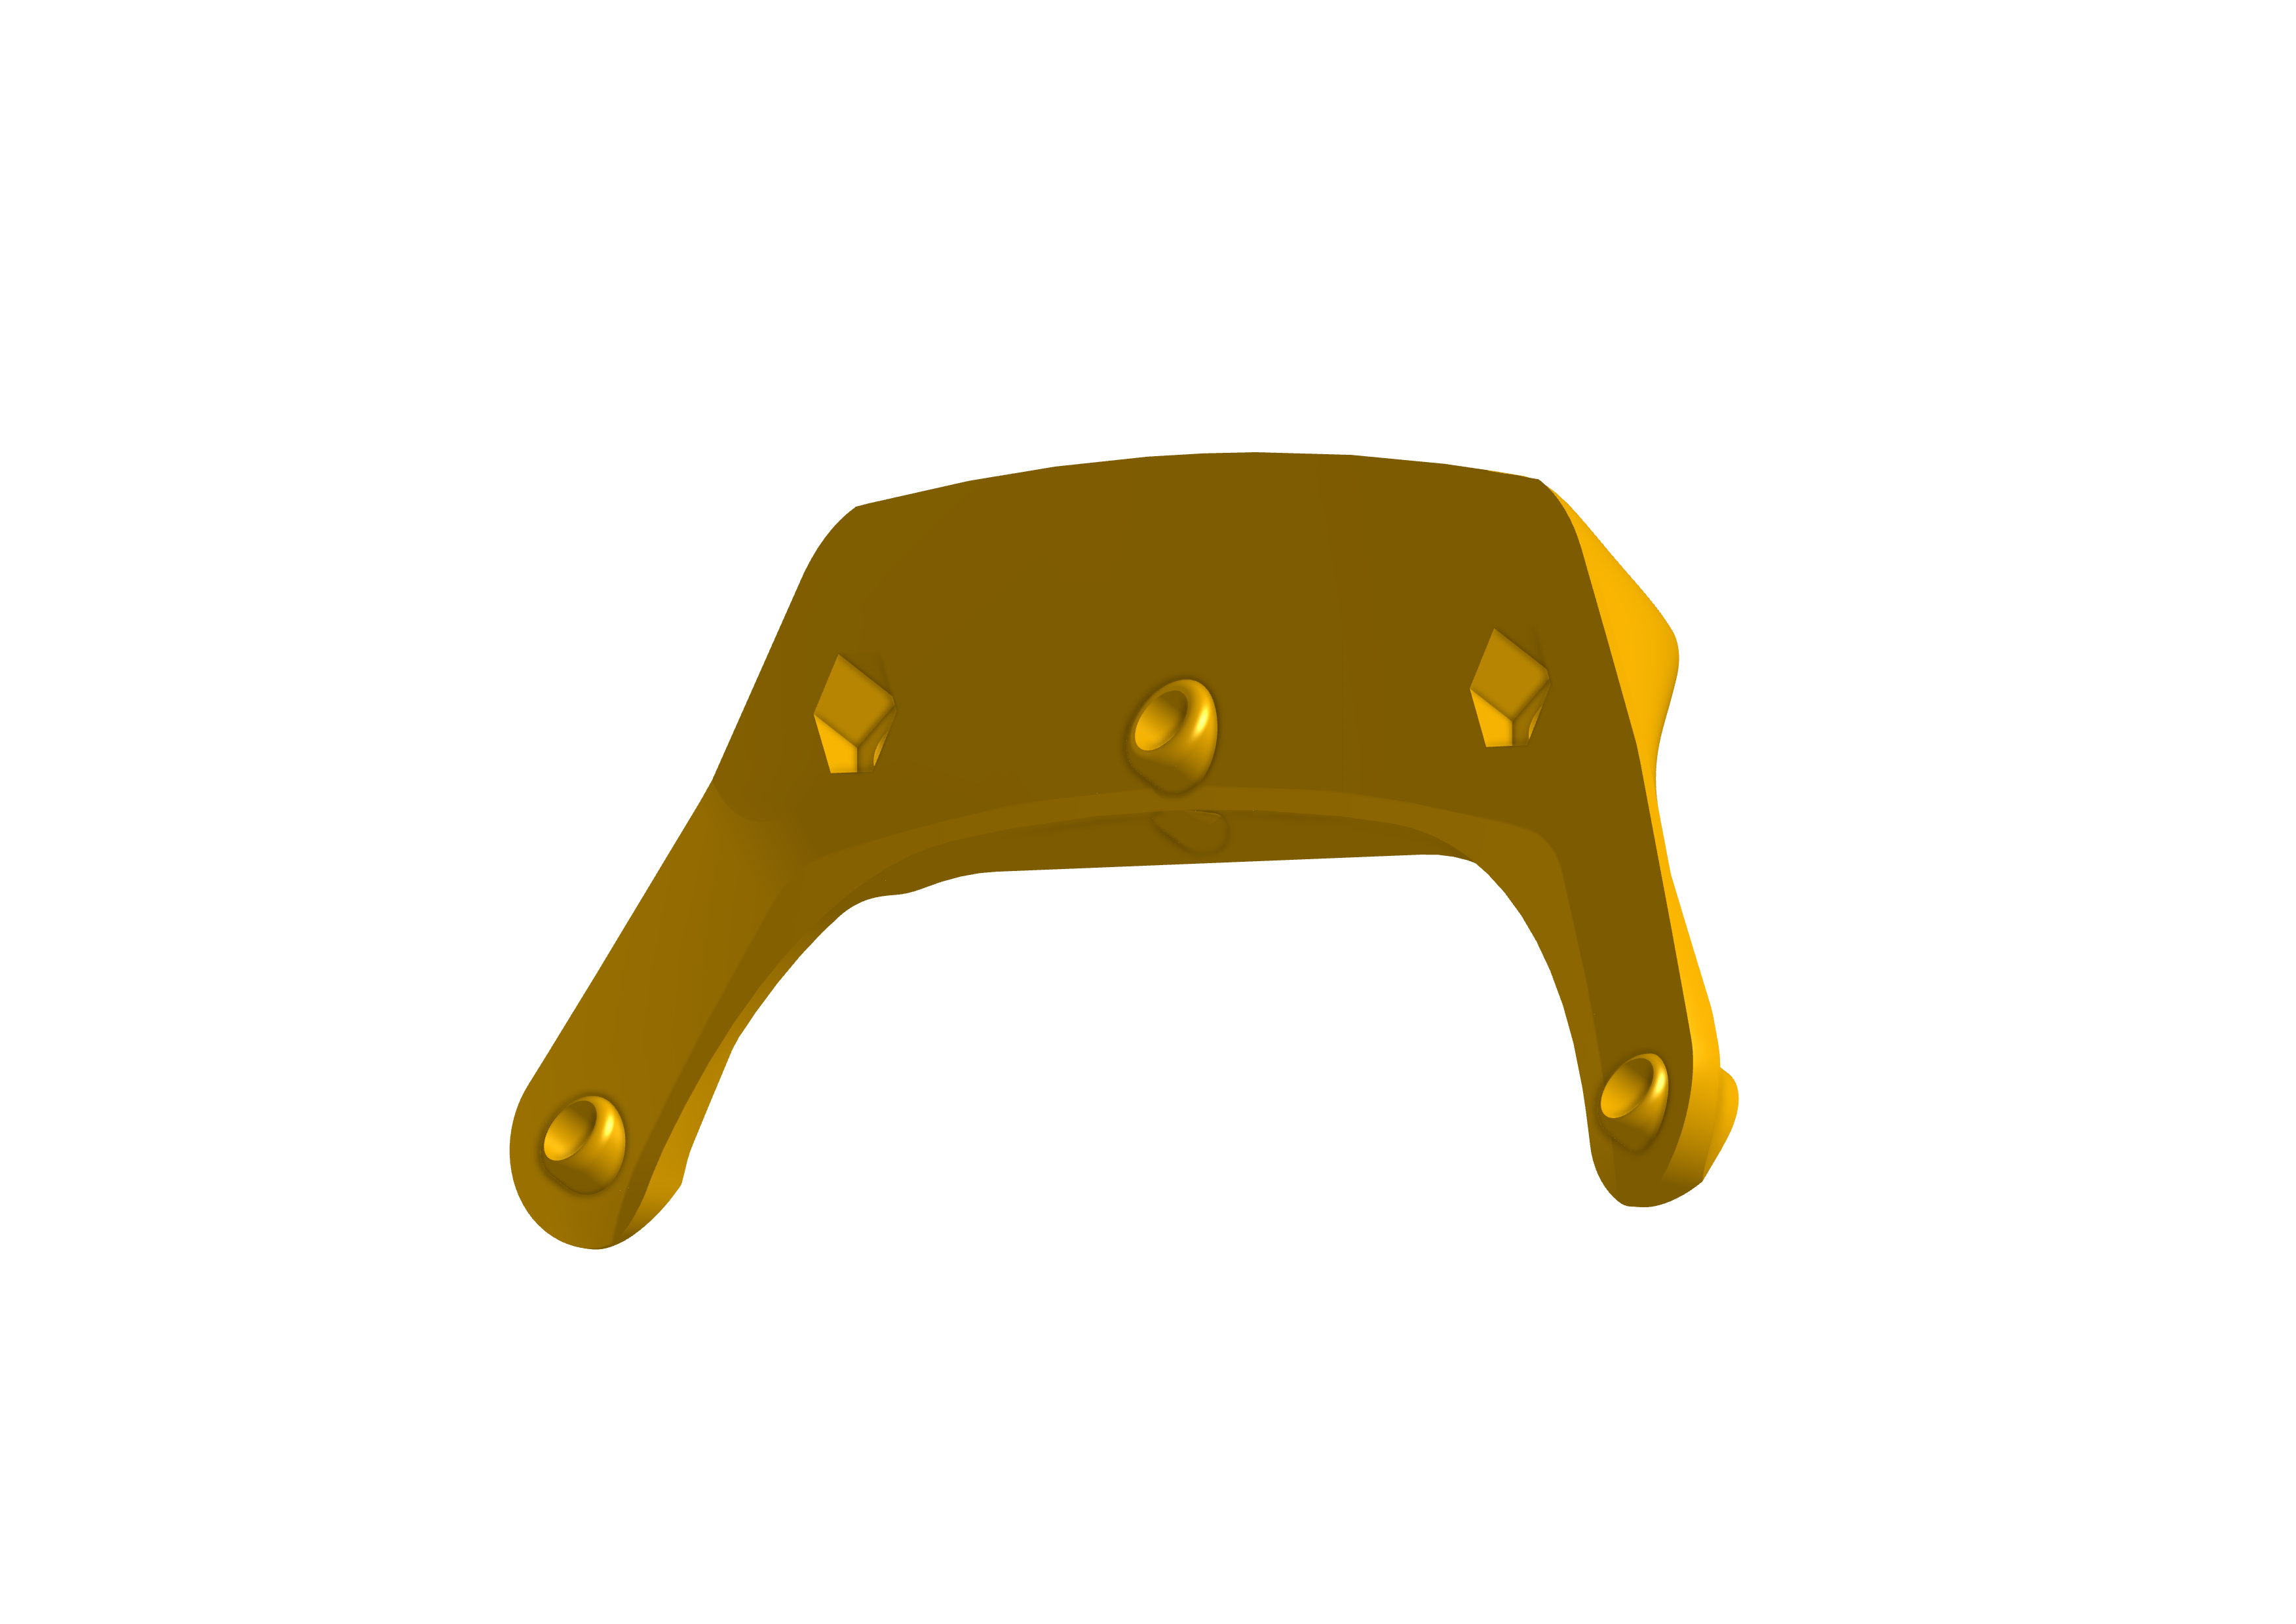
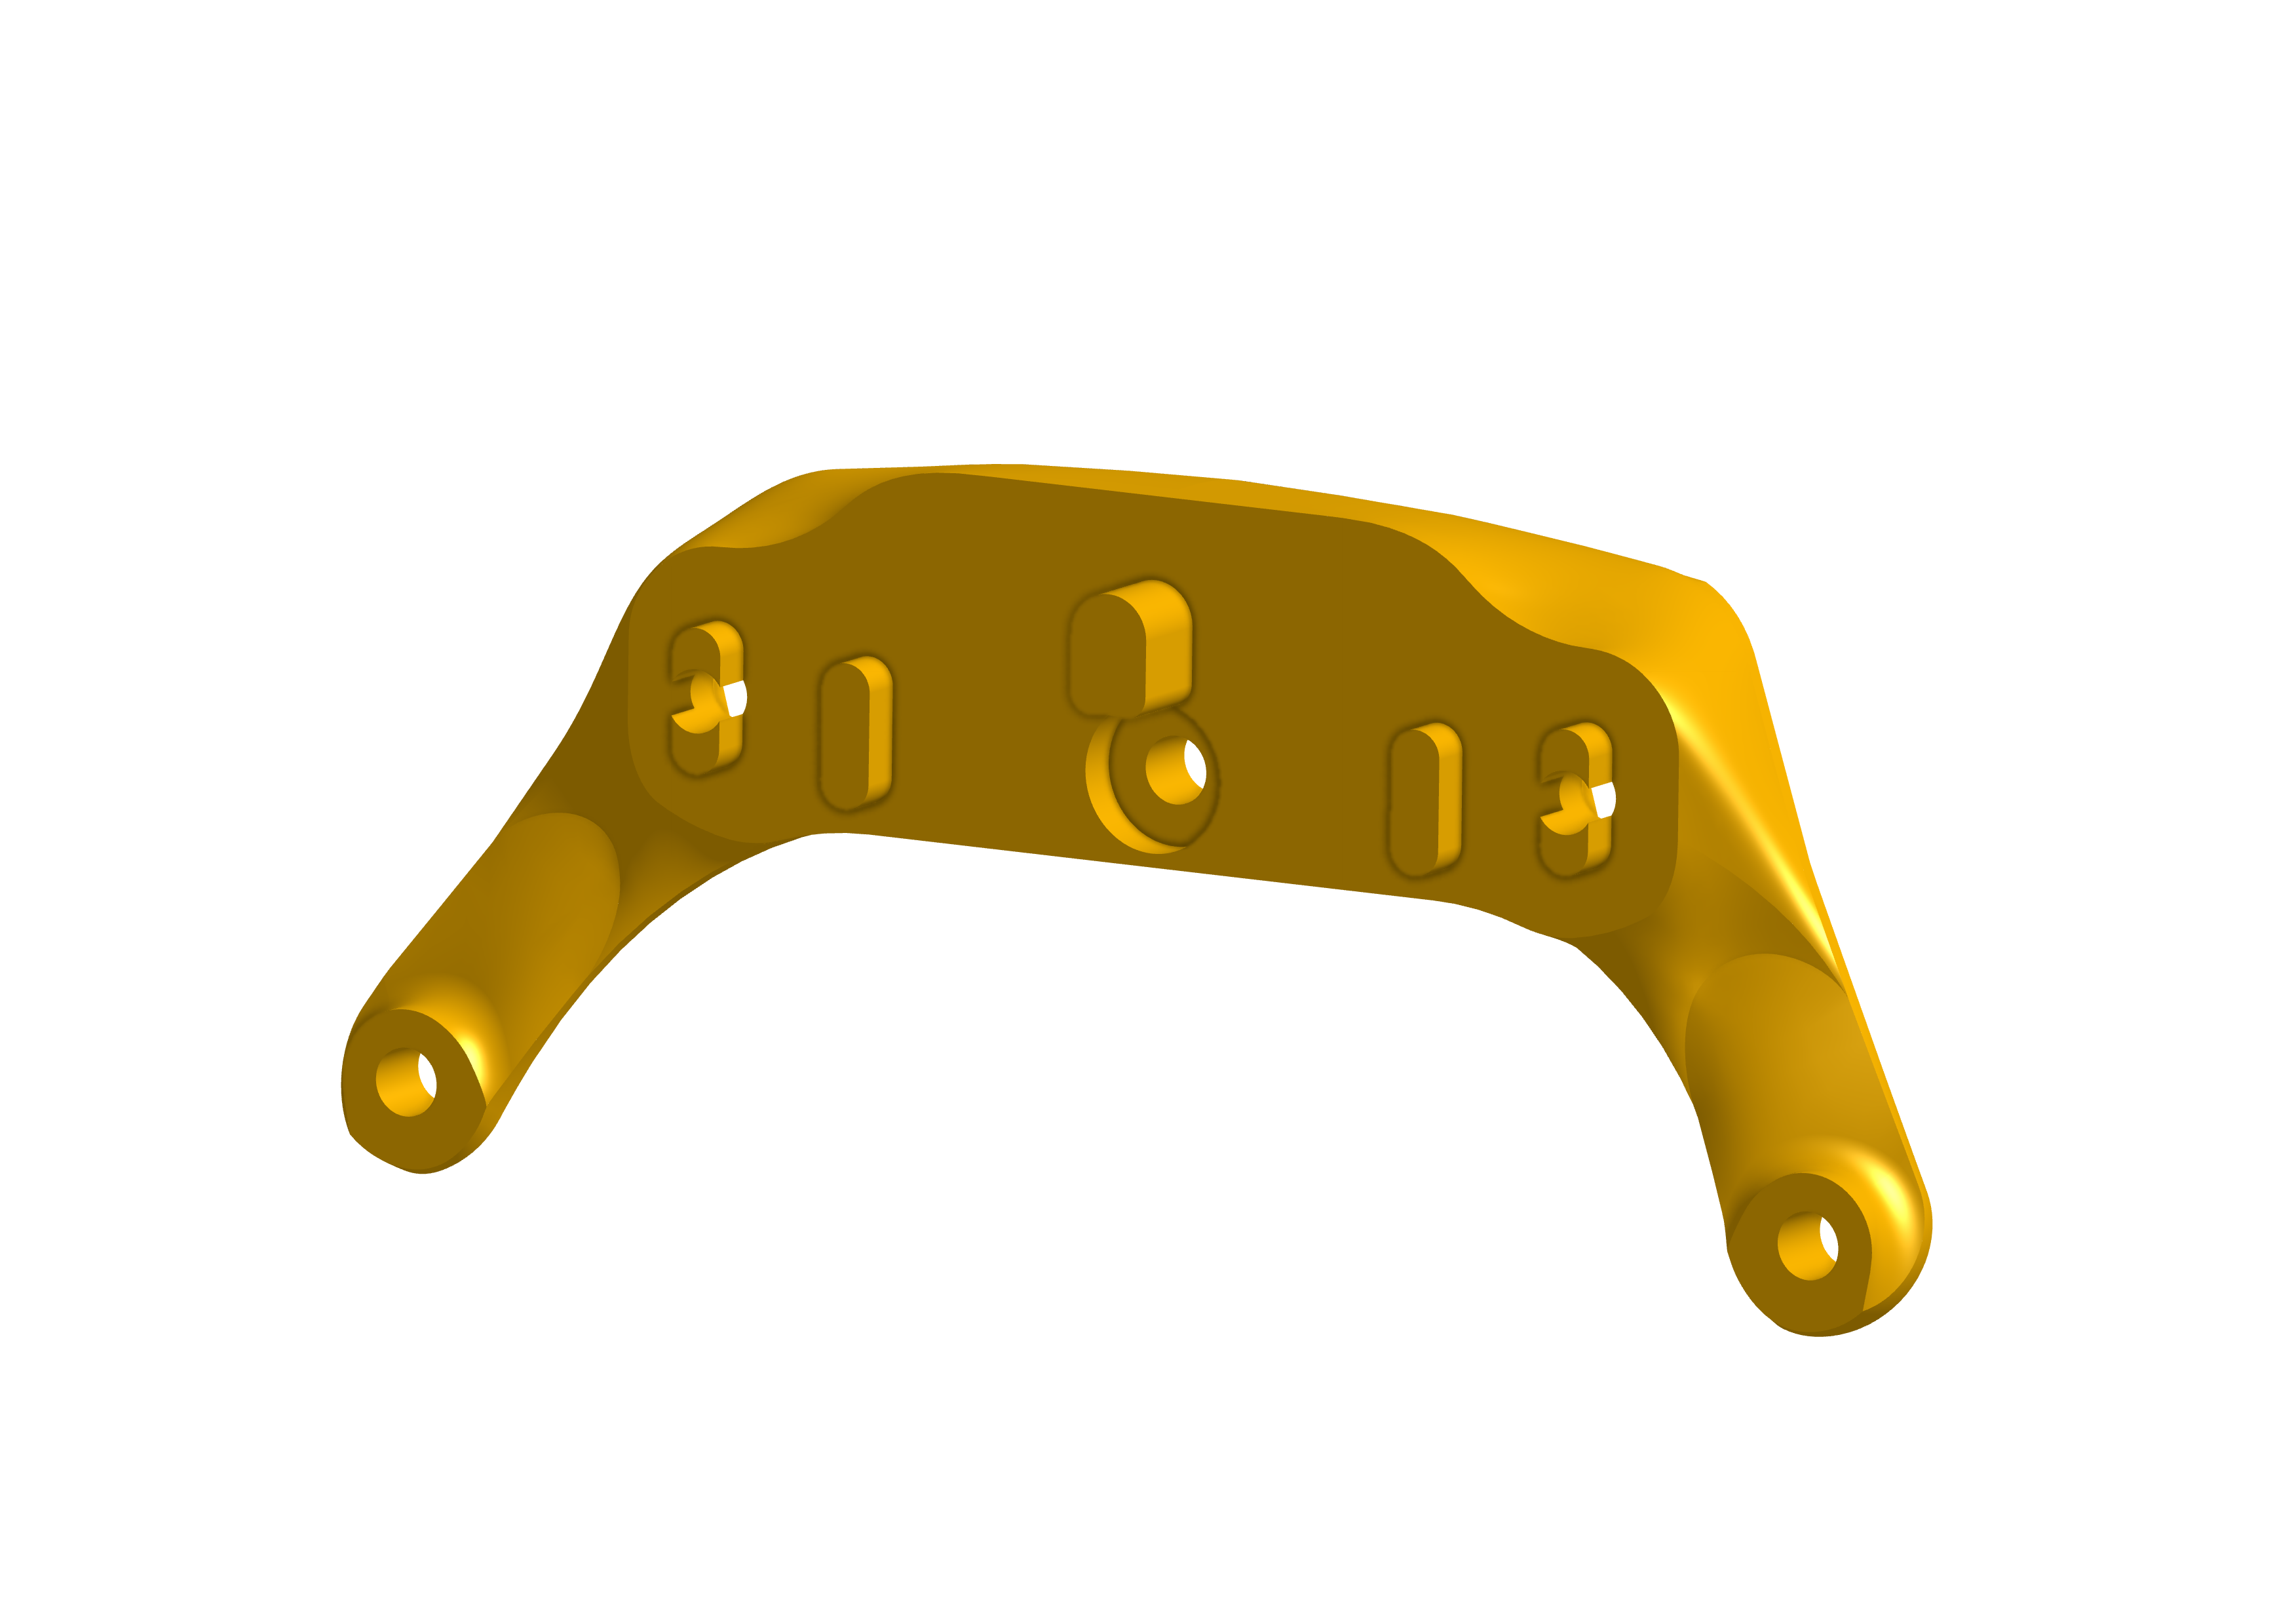
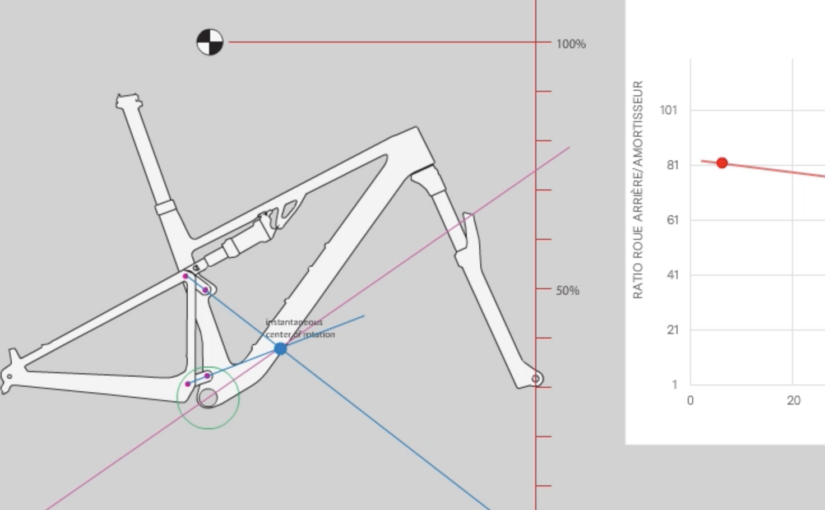
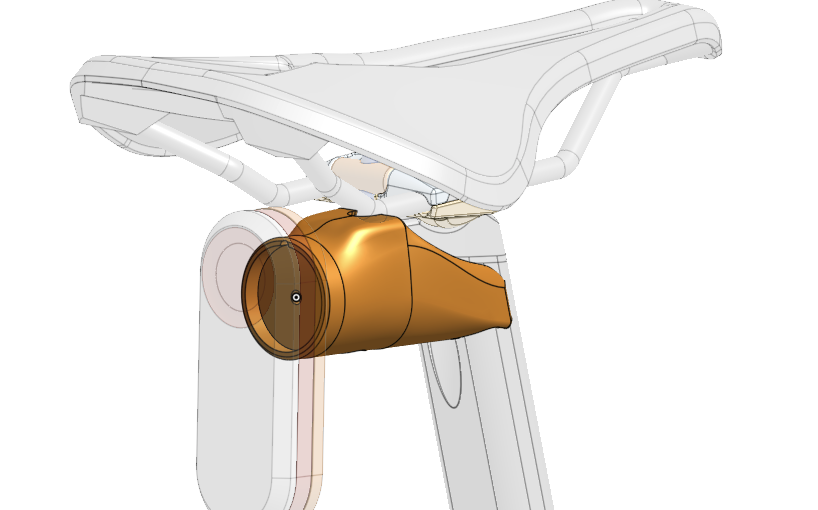
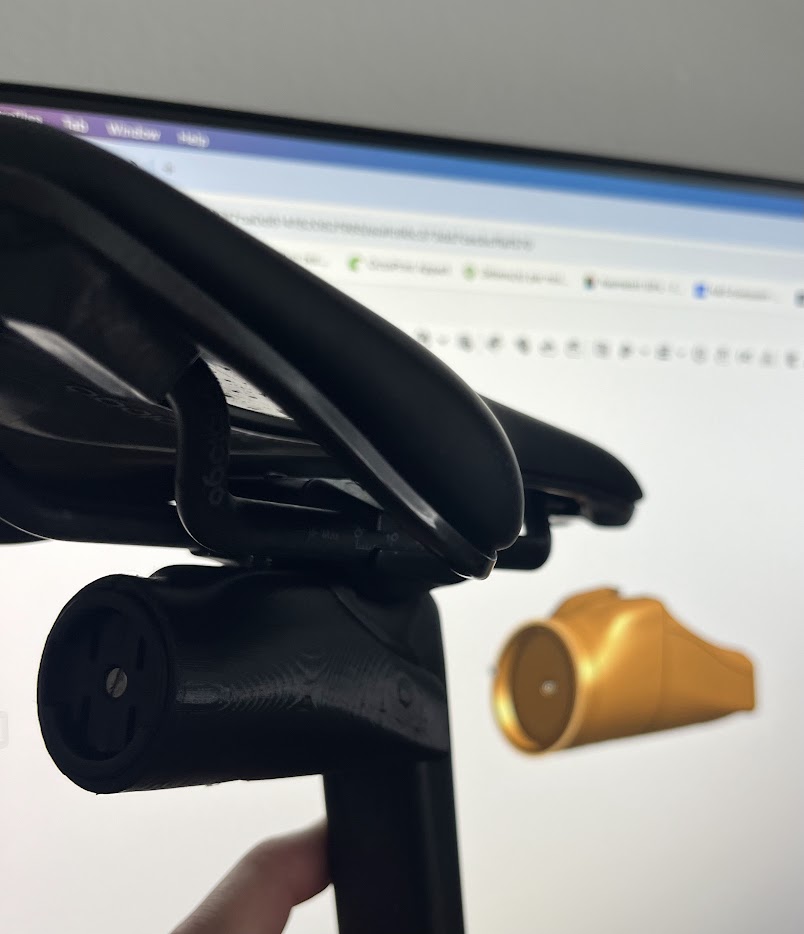
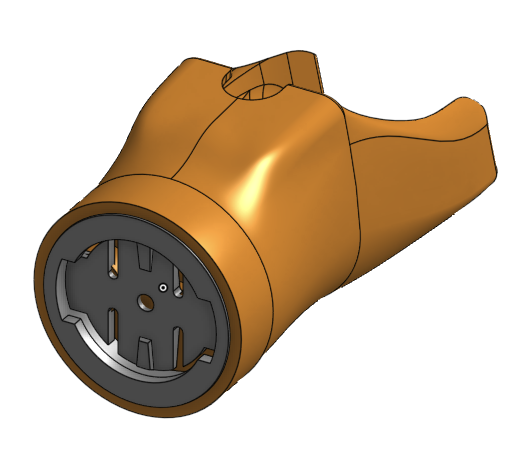
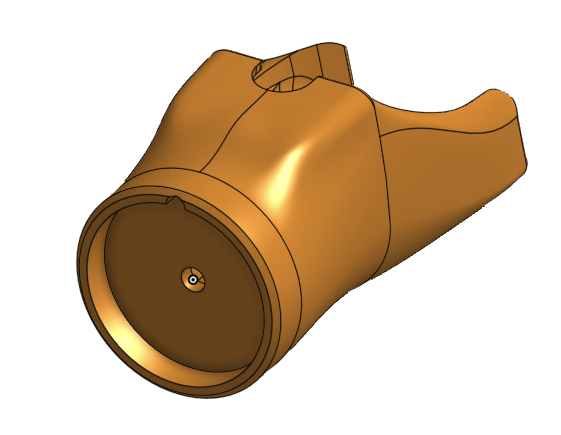
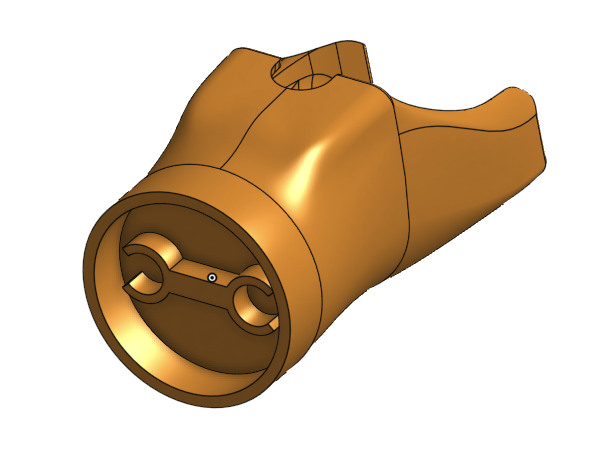
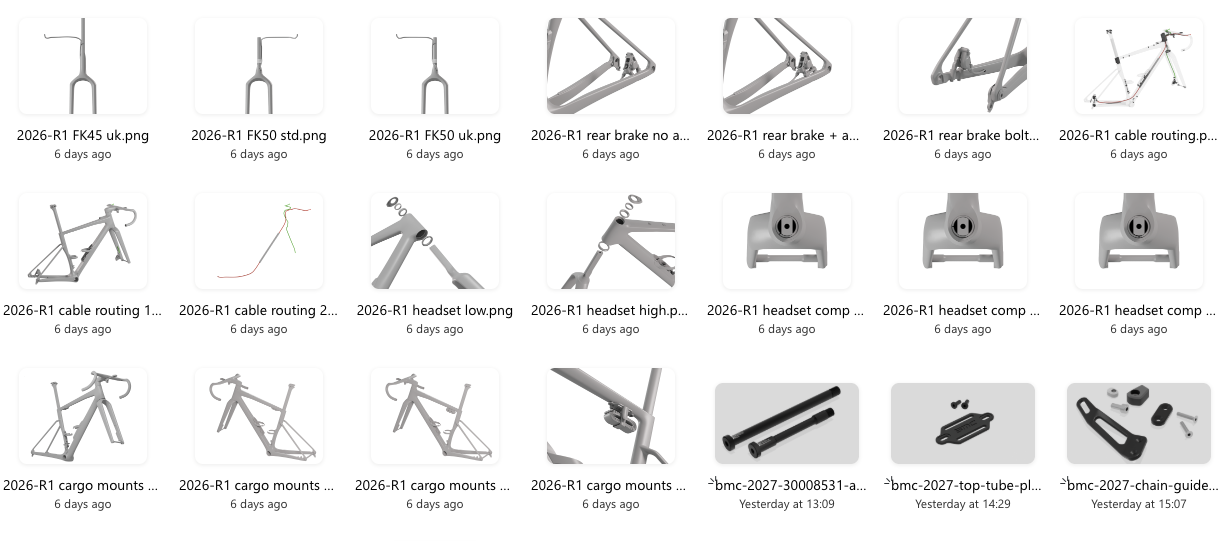
Creating Imagery with R&D 3D Data
A major step forward in this project was the use of 3D assets directly from R&D.
By leveraging native CAD data and rendering it in Blender, I was able to create:
- Clean, distraction-free visuals
- Perfectly accurate component representations
- Consistent angles and lighting across all images
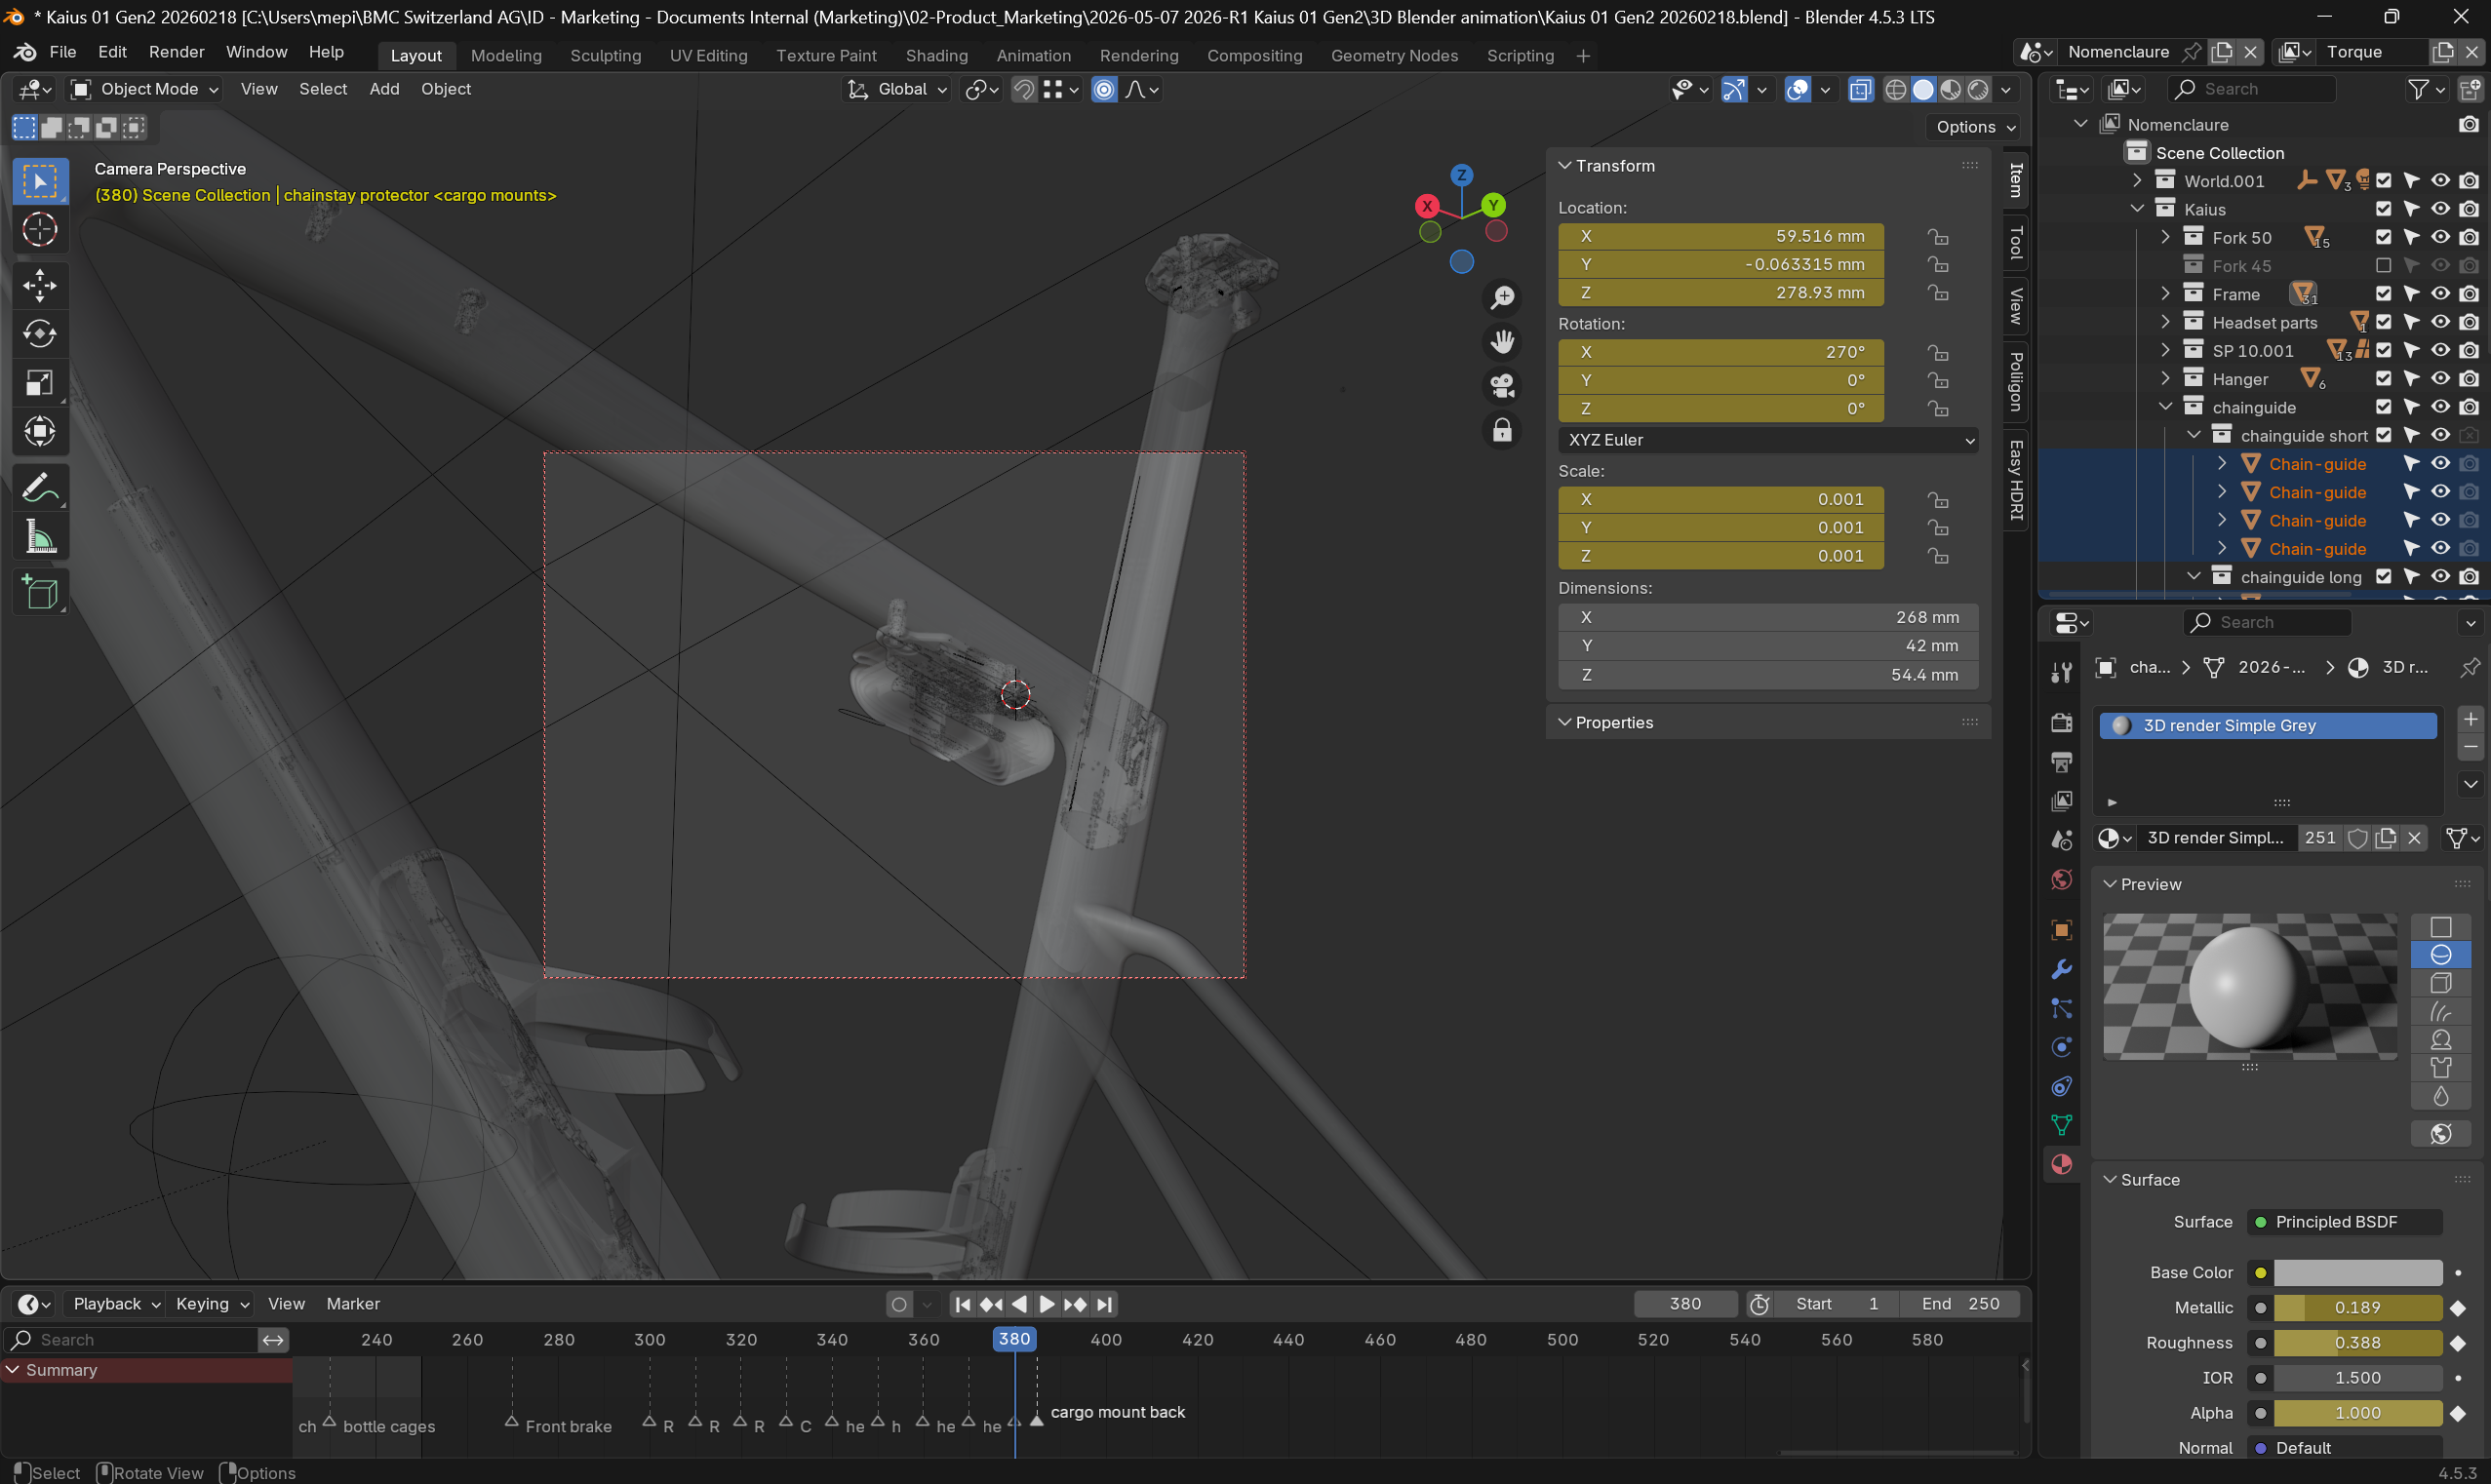
This approach solved a common issue with traditional manuals: photography limitations. Instead of dealing with physical prototypes, lighting constraints, or inconsistencies, the 3D workflow ensured full control and scalability.
It also allowed us to illustrate complex internal features and assemblies that would be difficult or impossible to capture with a camera.
Cross-Functional Collaboration
While the structure and core content were driven autonomously, the manual was ultimately a collaborative effort.
Close coordination was required across multiple teams:
- R&D for technical validation and 3D assets
- Quality for compliance, safety checks, and accuracy
- Product Management for product definition
- Marketing for tone, branding, and visual alignment
The challenge was not just gathering input, but organizing it efficiently. Clear ownership and structured reviews were key to keeping the process moving and avoiding unnecessary iterations.
From Draft to Approval
The final phase focused on alignment and validation.
Each section went through targeted reviews with the relevant stakeholders, ensuring that:
- Technical information was fully validated
- Safety-critical instructions were clearly highlighted
- Visuals matched the latest product specifications
- The overall document remained consistent and coherent
The result is a manual that reflects the product itself: precise, refined, and built with intent.

Key Takeaways
- A strong structure is the backbone of any effective manual
- Clarity and usability should drive copywriting decisions
- 3D-based imagery significantly improves consistency and quality
- Cross-functional collaboration is essential—but needs structure
- Ownership and autonomy help maintain speed and coherence
This project is a good example of how technical documentation, when approached as a product in itself, can elevate the overall user experience.
The final document: